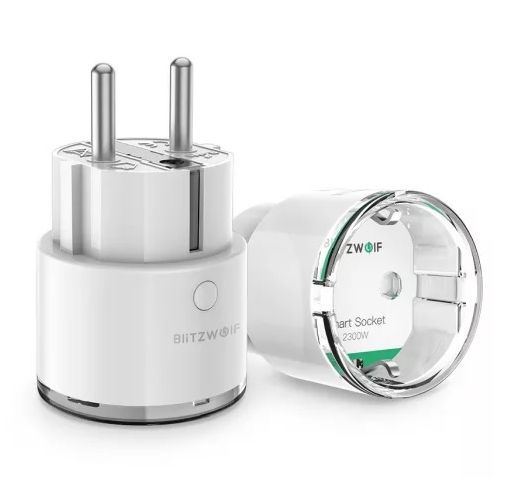
Blitzwolf BW-SHP6 Socket with powermonitoring
General Notes
Model reference: BW-SHP6
Manufacturer: BlitzWolf
There are two versions of this plug, a 10A version and a 15A version. The pinout seems to be the same.

GPIO Pinout
| Pin | Function (<2020) | Function (>2020) |
|---|---|---|
| GPIO0 | Red LED (inverted) | Red LED (inverted) |
| GPIO2 | Blue LED (inverted) | Blue LED (inverted) |
| GPIO4 | HLW8012 - CF1 | |
| GPIO5 | HLW8012 - CF | HLW8012 - CF |
| GPIO12 | HLW8012 - SEL | HLW8012 - SEL |
| GPIO13 | Button (inverted) | Button (inverted) |
| GPIO14 | HLW8012 - CF1 | |
| GPIO15 | Relay | Relay |
HLW8012 Calibration Values
| Value | <2020 | >2020 |
|---|---|---|
| Current | 0.00290 | 0.00117 |
| Voltage | 940 | 755 |
Basic Config
The configuration has some default sensors for wifi reporting, etc.
substitutions:
  device_name: shp6
  # Higher value gives lower watt readout
  current_res: "0.00290"
  # Lower value gives lower voltage readout
  voltage_div: "940"
  # Max Power is 3450W for 15A and 2300W for 10A
  max_power: "3450"
  # 2020 model uses GPIO4 for CF1
  cf1_pin: GPIO14
  # BW-SHP6, outlet with powermonitoring.
  # One button for the relay, and one red led for the relay, as well as a blue status led
  # Static IP is configured, and fast_connect is enabled, as the SSID is hidden
  # Webserver is active and pw protected, and the OTA is password protected

esphome:
  name: "${device_name}"
  on_boot:
    then:
      - switch.turn_on: relay
      - output.turn_on: led

esp8266:
  board: esp8285

wifi:
  ssid: !secret wifi_ssid
  password: !secret wifi_password
  ap:

logger:
  baud_rate: 0

api:

ota:
  password: !secret otapw

# Button configuration
binary_sensor:
  - platform: gpio
    name: "${device_name} button"
    id: button
    pin:
      number: GPIO13
      inverted: true
    on_press:
      then:
        - switch.toggle: relay

# Setup of LED's used in displaying Switch status
output:
  - platform: gpio
    pin: GPIO0
    inverted: true
    id: led

# Config for switch
switch:
  - platform: gpio
    pin: GPIO15
    restore_mode: RESTORE_DEFAULT_OFF
    id: relay
    name: "${device_name} Relay"
    on_turn_on:
      - output.turn_on: led
    on_turn_off:
      - output.turn_off: led

# Status LED for connection
status_led:
  pin:
    number: GPIO2
    inverted: true

# Sensors for Voltage (V), Current (A), Power (W), Daily energy usage (kWh)
sensor:
  - platform: hlw8012
    sel_pin:
      number: GPIO12
      inverted: true
    cf_pin: GPIO5
    cf1_pin: ${cf1_pin}
    current_resistor: ${current_res}
    voltage_divider: ${voltage_div}
    current:
      name: "${device_name} Current"
      unit_of_measurement: "A"
      accuracy_decimals: 3
      icon: mdi:flash-outline
    voltage:
      name: "${device_name} Voltage"
      unit_of_measurement: "V"
      icon: mdi:flash-outline
    power:
      name: "${device_name} Power"
      unit_of_measurement: "W"
      id: power
      icon: mdi:flash-outline
      on_value_range:
        - above: ${max_power}
          then:
            - output.turn_off: led
            - switch.turn_off: relay
    change_mode_every: 4
    update_interval: 10s
  - platform: total_daily_energy
    name: "${device_name} daily energy"
    power_id: power
    unit_of_measurement: "kWh"
    accuracy_decimals: 5
    filters:
      - multiply: 0.001
Advanced config additions
Starting with ESPHome v1.16.1 the hlw8012 platform sensor now supports energy, so we can add the following to the
hlw8012 platform sensor and get rid of the total_daily_energy platform sensor and the homeassistant time sensor:
sensor:
  - platform: hlw8012
    energy:
      name: "${device_name} Energy"
      unit_of_measurement: "Wh"
      icon: mdi:flash-outline
Under wifi this can be added, this will set up static IP, allow the device to connect to a hidden SSID (fast_connect) and create a backup AP
wifi:
  reboot_timeout: 60min
  manual_ip:
    static_ip: 192.168.1.100
    gateway: 192.168.1.1
    subnet: 255.255.255.0
  fast_connect: true

  # Enable fallback hotspot (captive portal) in case wifi connection fails
  ap:
    ssid: "${device_name} Hotspot"
    password: !secret appw
This will activate the internal webserver with password protection
web_server:
  port: 80
  auth:
    username: !secret webuser
    password: !secret webpw
To set time locally to the same as on the HomeAssistant (better logging)
# Sets time from Homeassistant
time:
  - platform: homeassistant
    id: homeassistant_time
Send a notification to Home Assistant when max power is exceeded.
sensor:
  - platform: hlw8012
---
power:
  name: "${device_name} Power"
  unit_of_measurement: "W"
  id: power
  icon: mdi:flash-outline
  on_value_range:
    - above: ${max_power}
      then:
        - output.turn_off: led
        - switch.turn_off: relay
        - homeassistant.service:
            service: persistent_notification.create
            data:
              title: Message from ${device_name}
            data_template:
              message: Switch turned off because power exceeded ${max_power}W
To have different data shown for the device (ESPHome version) and the wifi. Will appear as sensors in HA.
# Sensors for ESP version and WIFI information
text_sensor:
  - platform: version
    name: "${device_name} ESPHome Version"
  - platform: wifi_info
    ip_address:
      name: "${device_name} ip"
    ssid:
      name: "${device_name} ssid"
This will create sensors so that you can track wifi coverage for the devices, and also note the uptime for the devices.
sensors:
  - platform: wifi_signal
    name: "${device_name} WiFi Signal"
    update_interval: 60s
    accuracy_decimals: 0
  - platform: uptime
    name: "${device_name} Uptime"
    unit_of_measurement: days
    update_interval: 300s
    accuracy_decimals: 1
    filters:
      - multiply: 0.000011574