Generic Chinese Brand WiFi Smart Power Strip
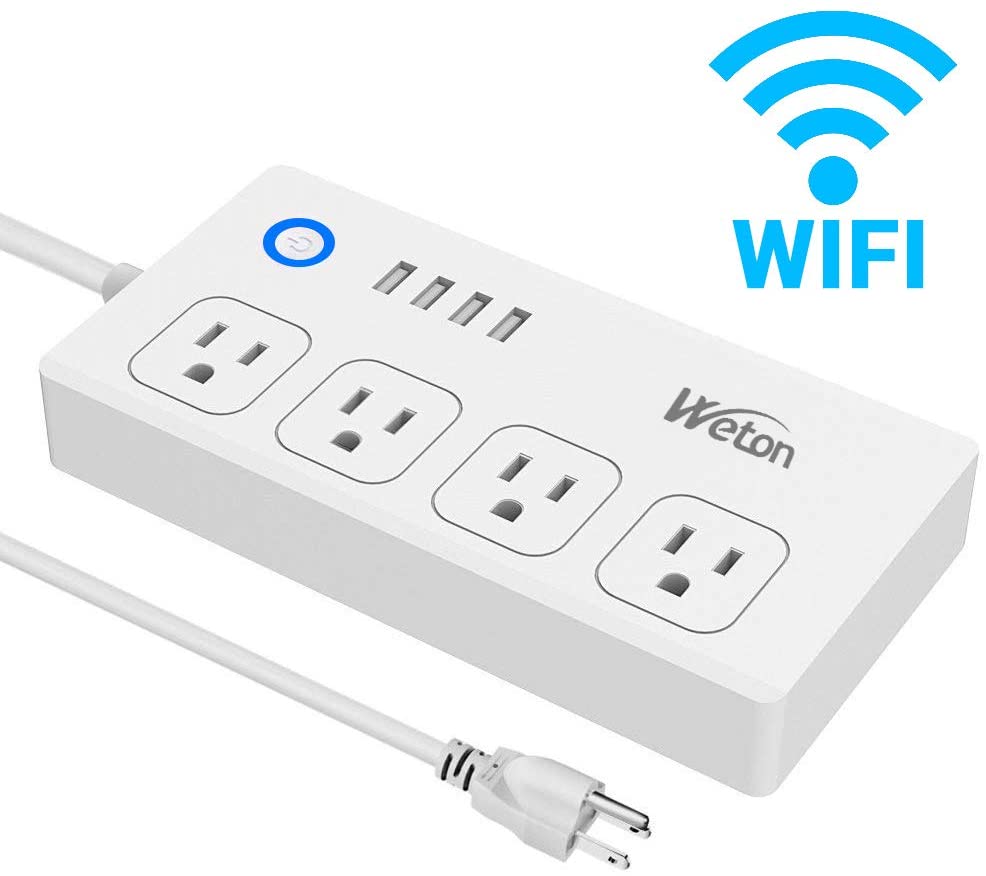
The generic cheap Chinese brand smart power strips of various unheard brands among various platforms, including Amazon, gearbest, banggood, and ebay, all with the product form factor as shown in the picture.
This type of device typically has four individually controllable AC outlets (each bonded with a (red) status LED), and four combined USB ports (not individually controllable but bonded with a (red) status LED). Also, there is a pushbutton(power button), and two individually controllable LEDs behind the button (in my specific model blue and white).
GPIO Pinout
For reference only if you want to develop something more than the basic functions.
| Pin | Function |
|---|---|
| GPIO0 | Led1 (Inverted: true) |
| GPIO3 | Led2 (Inverted: true) |
| GPIO4 | Socket 1 (Inverted: true) |
| GPIO5 | Push Button (Inverted:true) |
| GPIO12 | Socket 3 (Inverted: true) |
| GPIO13 | Socket 2 (Inverted: true) |
| GPIO14 | Socket 4 (Inverted: true) |
| GPIO16 | 4 USB Ports |
Firmware Setup
I flashed this device with tuya-convert OTA, which worked straight off. I flashed it directly with ESPHome with no problem.
Code
The settings are straight forward to hand over all the hardwares to Home Assistant, with the only local automation to be the power(push) button, which toggles all relays. (The automation is set to turn on all relays in case any relay is already on to prevent unwanted loss of power to connected device(s).)
substitutions:
  device_name: "***"

esphome:
  name: "${device_name}"

esp8266:
  board: esp01_1m

# Enable logging
logger:

# Enable Home Assistant API
api:

ota:
  password: "***"

wifi:
  ssid: "***"
  password: "***"

  # Enable fallback hotspot (captive portal) in case wifi connection fails
  ap:
    ssid: "***"
    password: "***"

captive_portal:

switch:
  # Relay - Socket 1
  - platform: gpio
    name: "${device_name} socket 1"
    pin:
      number: 4
      inverted: true
    id: relay_socket_1
  # Relay - Socket 2
  - platform: gpio
    name: "${device_name} socket 2"
    pin:
      number: 13
      inverted: true
    id: relay_socket_2
  # Relay - Socket 3
  - platform: gpio
    name: "${device_name} socket 3"
    pin:
      number: 12
      inverted: true
    id: relay_socket_3
  # Relay - Socket 4
  - platform: gpio
    name: "${device_name} socket 4"
    pin:
      number: 14
      inverted: true
    id: relay_socket_4
  # Relay - USB
  - platform: gpio
    name: "${device_name} USB"
    pin:
      number: 16
      inverted: false
    id: relay_usb

binary_sensor:
  - platform: gpio
    pin:
      number: 5
      inverted: true
    name: "${device_name} Button"
    on_click:
      if:
        condition:
          and:
            - switch.is_on: relay_socket_1
            - switch.is_on: relay_socket_2
            - switch.is_on: relay_socket_3
            - switch.is_on: relay_socket_4
            - switch.is_on: relay_usb
        then:
          - switch.turn_off: relay_socket_1
          - switch.turn_off: relay_socket_2
          - switch.turn_off: relay_socket_3
          - switch.turn_off: relay_socket_4
          - switch.turn_off: relay_usb
        else:
          - switch.turn_on: relay_socket_1
          - switch.turn_on: relay_socket_2
          - switch.turn_on: relay_socket_3
          - switch.turn_on: relay_socket_4
          - switch.turn_on: relay_usb

sensor:
  # WiFi Signal Sensor
  - platform: wifi_signal
    name: "${device_name} WiFi Signal Strength"
    update_interval: 60s

light:
  - platform: binary
    name: "${device_name} LED 1"
    output: light_1_output
  - platform: binary
    name: "${device_name} LED 2"
    output: light_2_output

output:
  - id: light_1_output
    platform: gpio
    pin:
      number: 0
      inverted: true
  - id: light_2_output
    platform: gpio
    pin:
      number: 3
      inverted: true